How to replace SD-Speaker and SD-Microphone?
Repair and replace your microphone and speaker every year to keep the sound optimal. Especially the microphone is fragile and needs to be change once in a while. It’s not a hard job. You can always send your headset for repair and inspection without any costs. We will only charge the shipment back and the microphone component. Standard repair service for microphone and speaker when buying at Bb-Talkin.eu

New Product features and replaceable components
- new design & structure
- improved voice quality
- support any helmet (not rubber painted helmet)
- low cost on repair
- easy to repair

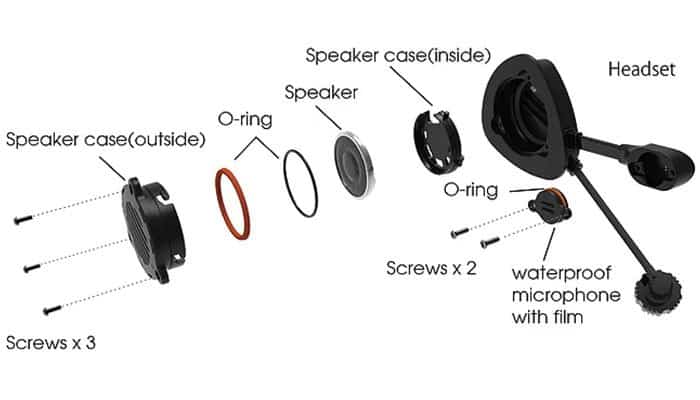
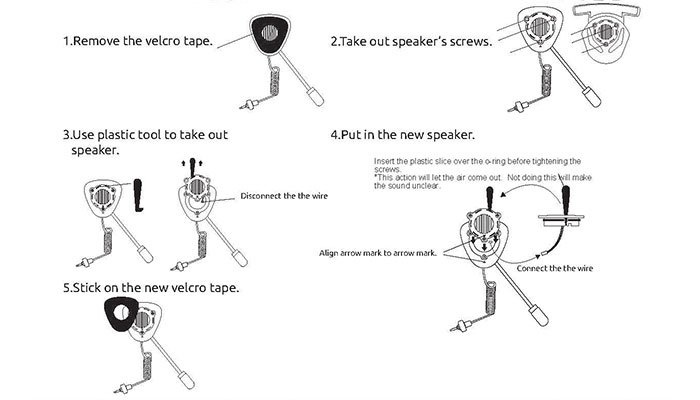
Speaker repair and replacement (SD-SPK)
Our speakers will not last forever. The product is used in harsh conditions, heat, cold, water, salt, sun and sand that will destroy any plastic object after a while. Our speaker is one of the most delicate parts. So we decided to make the product with easy to repair speakers. We recommend to send your speaker for repair to your nearest dealer. But this could take more time. If you do not want to wait you can order extra speaker replacement (SD-SPK) and change it yourself easily.

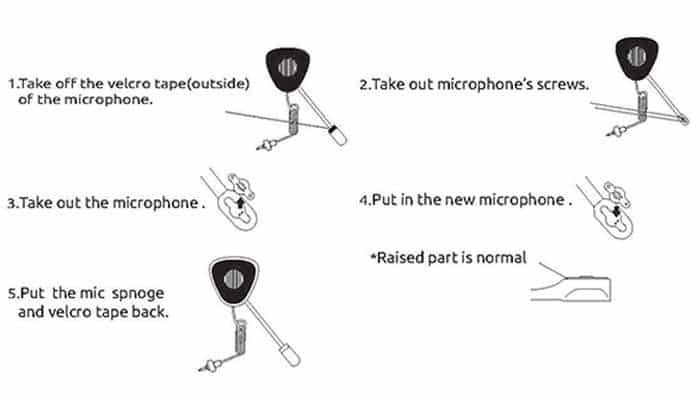
Microphone repair and replacement SD-MIC
Use 2 intercoms: Use 2 working intercoms that you can pair. Let’s call them nr1 and nr2. On nr1 intercom you listen to what you are doing and when the microphone is placed correct. On intercom nr2 you add the headset with microphone that needs to be replaced.
Remove old mic and test connection: After you removed the old broken microphone from the headset you can test the connection. Use a paper clip to connect the 2 pins you see where the mic should go and connect them together. You should hear a scratching sound and indicates the headset is still functioning. If there is no sound, the headset is beyond repair.
Install new mic: When installing the microphone. Make sure you don’t see the red ring on the outside to much the less the beter. Push the microphone in place above the two pins. Carefully put pressure with your thumb. When holding pressure on the microphone, put the screws in place (not to tight!) on both sides without letting the pressure go (keep mic in place). Only when both screws are in the right place, you can let go. This makes sure you do not put to much pressure on only one side of the mic and prevents it from braking close to the screw hole.
Unlimited repair service only at Bb-Talkin.EU
If you do not want to repair or check your devise yourself. You can always send it to us for check. This is a free service always! Even if warranty is off. You send the headset to us. We check and install the speaker or microphone for free and only charge shipment and the component when returning.
